Open Moulding in Turbo CAD and Create a New File for 3d moulding
Open Up a New file in Turbo CAD and open up the Turbo CAD file of the Molding.
Select New>From Template>( then the correct Profile Template, base, crown, ect)
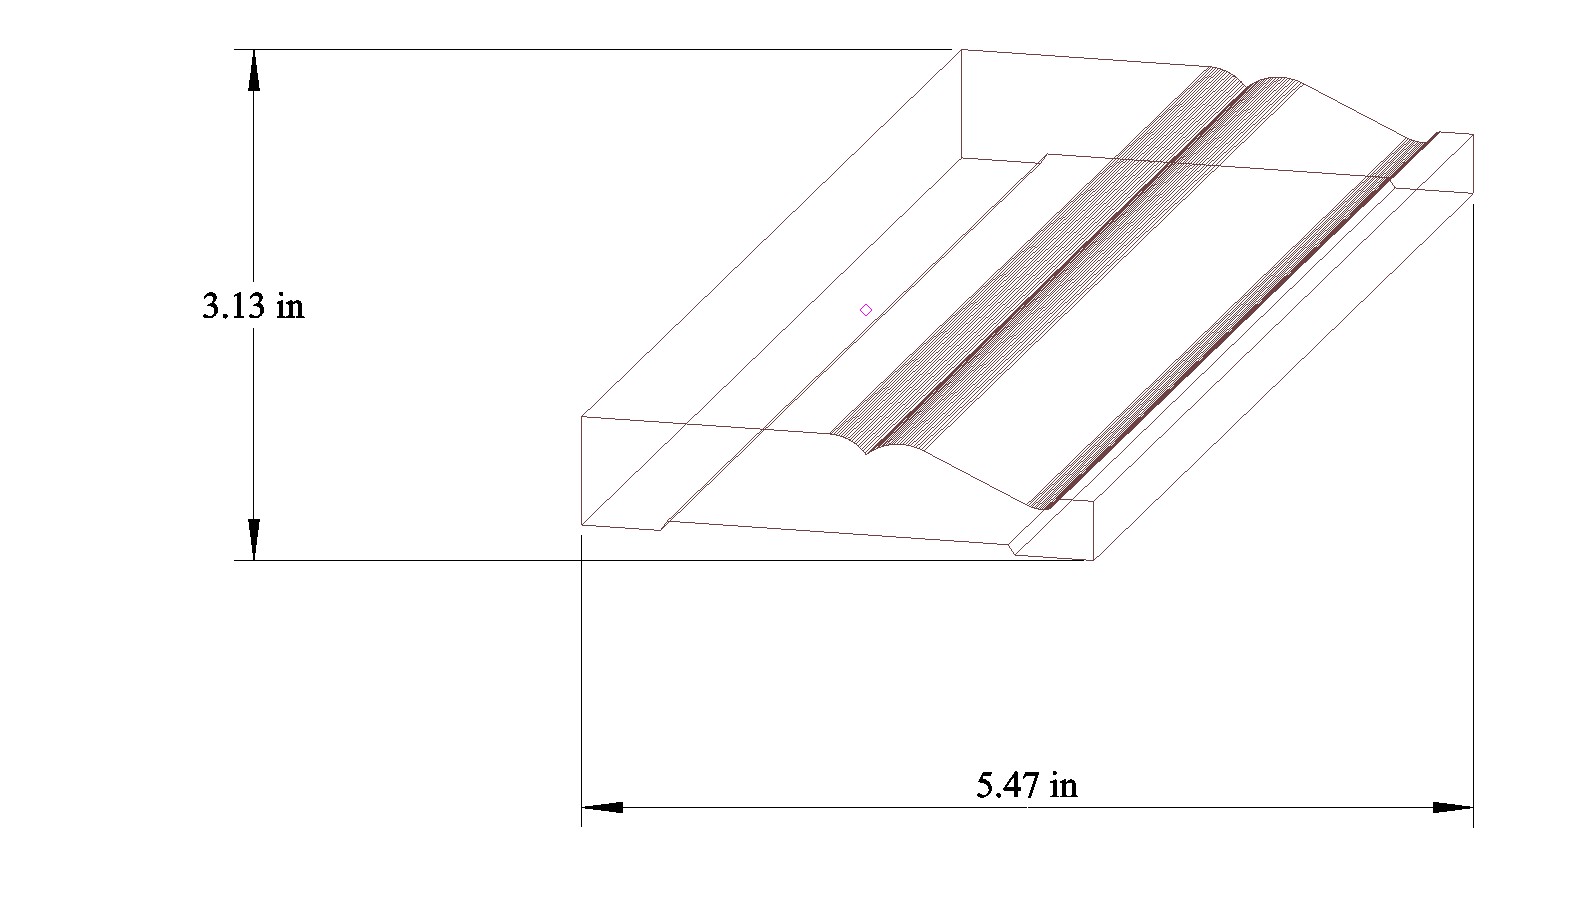
Draw a 3D photo of the Moulding
Select the outline of the Molding and copy it from the original drawing, go over to your new file and paste it in there.
For a Casing Make sure the Profile is to the right so that the thick part of the molding is toward the left.
For a Base make sure the Profile is to the left so that the thick part of the moulding is toward the Right.
If you need to change this you can mirror the Moulding, and deleting the original.
Move the center point to the correct position per the moulding. (to move select the whole moulding, Press “D” and then place the new reference point.
Casing
Reference Point = Bottom Left
Crown, Base, Chair
Reference Point = Center
Then select the whole molding and touch the Reference point, while it is in the drag mode press the “tab” key and enter “0” in the Pos X, Tab again and enter “0” for the Pos Y. then hit enter.

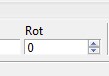
If it is a Crown Moulding enter a Rotation of 135

If it is a BaseBoard enter a Rotation of 270
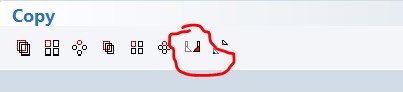
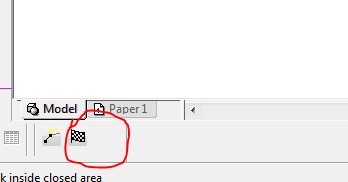
Select the Hatching tool.
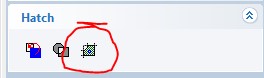
And touch inside the Moulding to create hatching.
Then Hit finish
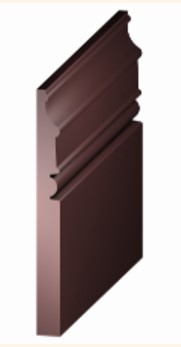
Select the whole moulding, and right click in the middle and select Properties.
And match them with the following pictures…….
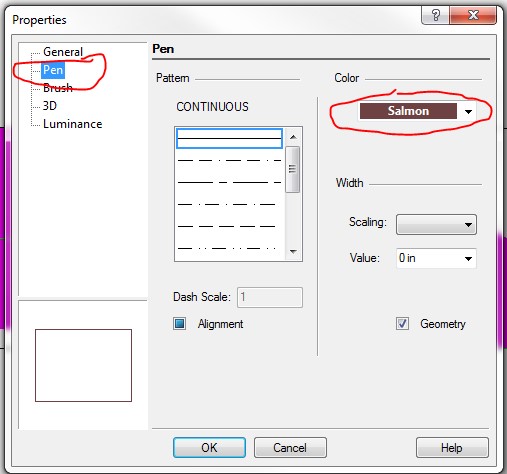
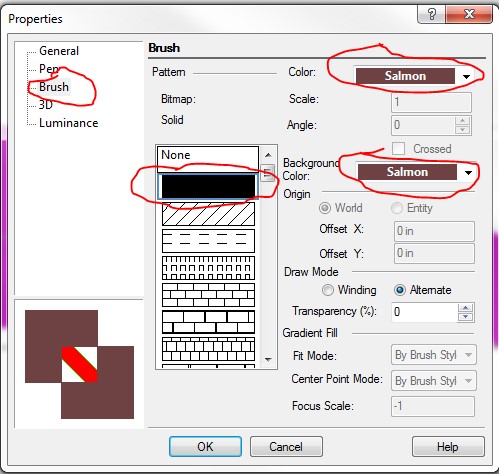
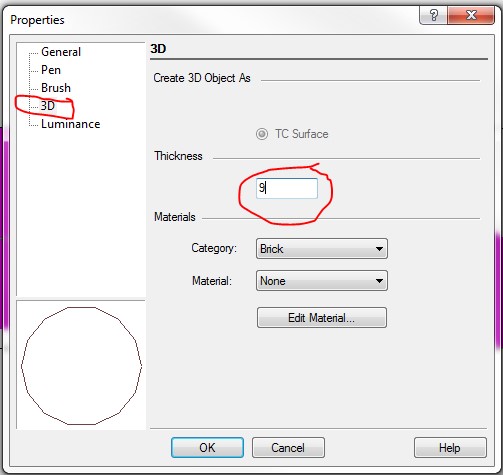
Then hit OK.
Fill in the rotation at the bottom, As follows per the moulding type….

Casing, Base, Chair – Rotate drawings X = 15, Y = 345, Z = 0
Crown – Rotate drawings X = 0, Y = 30, Z = 0
Hit “Enter”
Find out the Width and Height of your Profile, and write it on a scrap paper or something for later, and delete the measurements.
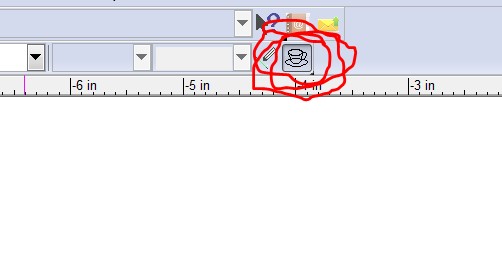
Now Select and change, by pressing and holding, the Render type, to quality render.
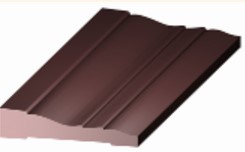
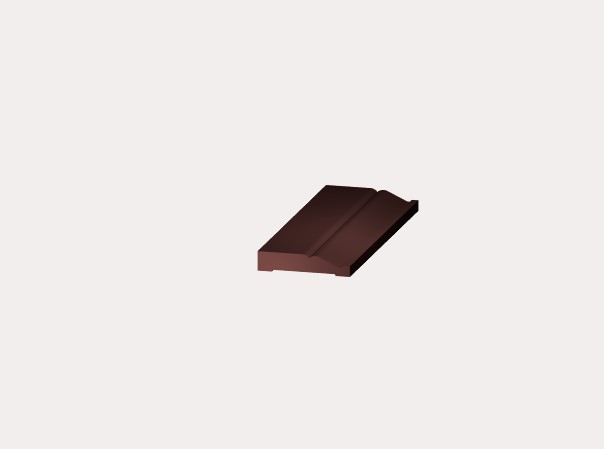
Now it should look something like this.
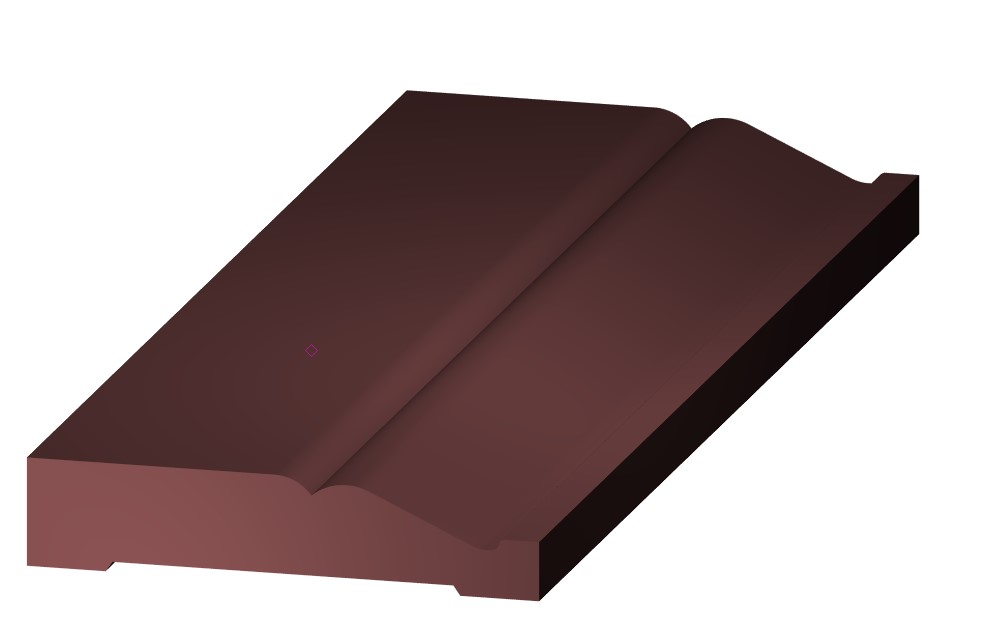
If it does you are Ready to
Export or Save As this image to a Png
Go to File>Save As
Change the Save as Type to Png.
Save to: workgroup>Concept>Products>Mouldings>Renderings>Finished PNG Rendering Files with Transparent Background
File Name (GM—)
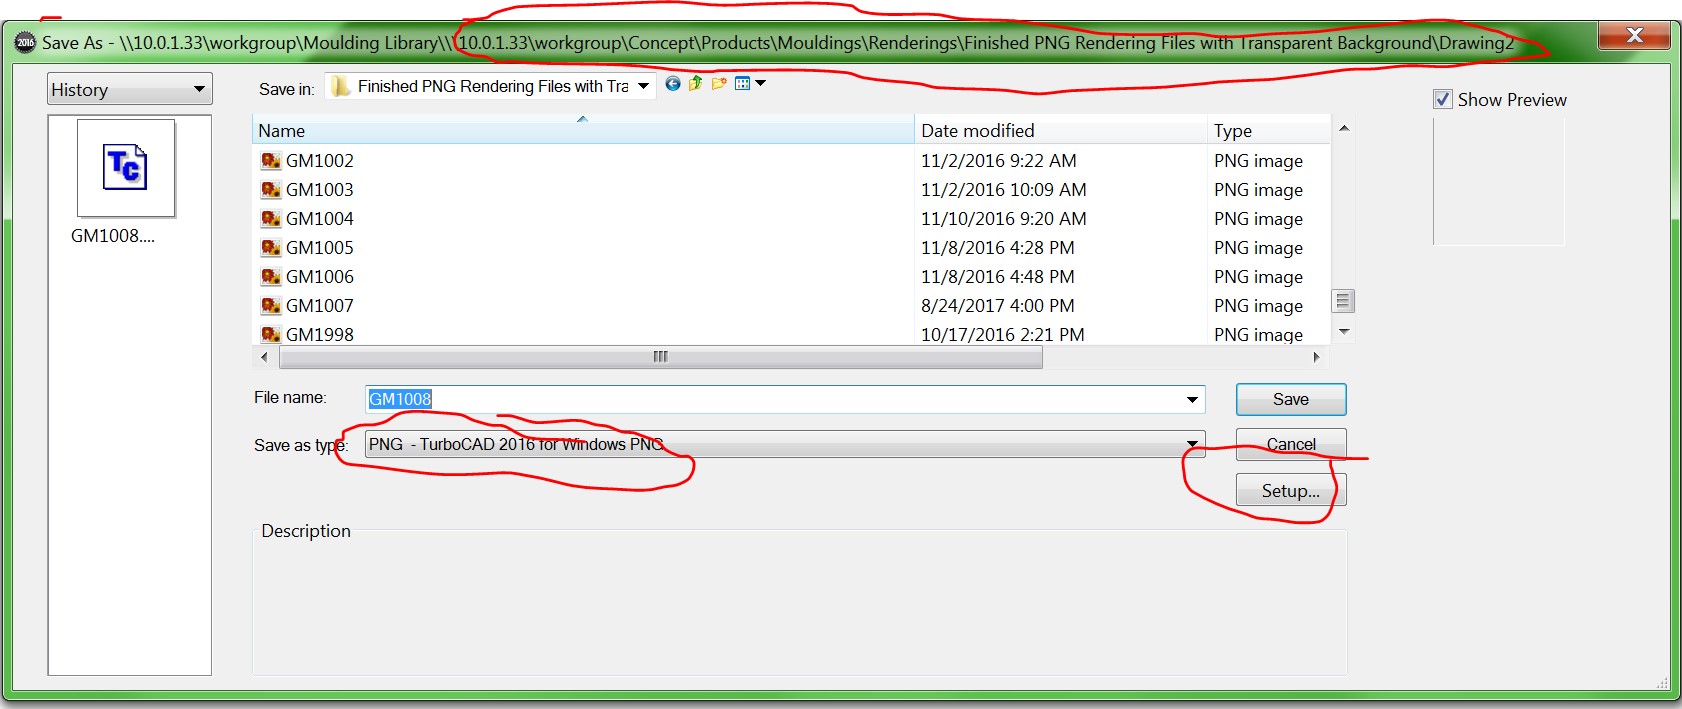
Press “Setup”………..
Make sure all the settings are matched to photo.
The Height and Width Circled in red change those to (your measurements in inches that you wrote down somewhere on a scrap piece of paper , multiply by 30) enter to the nearest number.( no decimals)
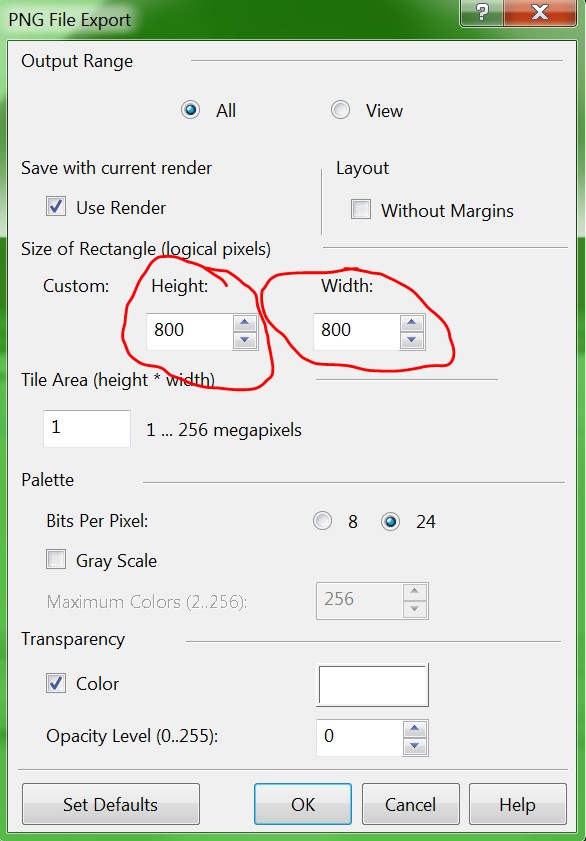
Okay it , and then hit “save”
Go to the file and changed the file name extension to read “.png” lower case letters.
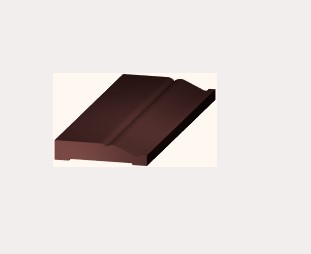
To double check it open up the Picture and it should look similar to this, with no visible white box.
Not like this …….
Save Turbo Cad Drawing to workgroup>Concept>Products>Mouldings>Renderings>Turbo Cad Rendering Fiiels> GM -#–
SOP To Enter Info into Spreadsheet
Open Spreadsheet from workgroup>Consept>”Iport Master”
Click mouldings ,
Navigate to the correct GM #.
Fill in the Following….. DO NOT EDIT ANY OTHER CELLS!!!!!!!!!!!!
* Name= GM + #
* Moulding Category= STAIR_PARTS – FLOORING – DOOR_WINDOW – MISCELLANEOUS – ROSETTES_PLINTHS – CAP_PANEL – CABINET_FURNITURE – CORNER_MOULDINGS – WAINSCOT – SIDING – CROWN – BASE_BOARD – CHAIR_RAIL – CASING –
* Moulding Subcategory = Select one from the list.
* Profile Description = Give a short Description of the profile ( this will show on the quote)
* SUC (Set Up Charge) = for mouldings in LNFT is “0” , and rosettes and by piece is “100”
* HandRail PlowWidth = if it’s a Hand rail it is the plow width.
* Use Backband = if the moulding uses a back Band enter “TRUE”
* Dado Default = If the moulding has a dado enter the Standard Dado depth
* Dado Max = if the moulding has a dado enter the maximum dado depth
* Moulding Thickness = overall Moulding Thickness in Decimal format
* Moulding Width = Overall Moulding Width in Decimal Format
* Moulding Length = the Length for any moulding we sell by the piece , LnFt Mouldings are “0”
* Radius Moulding = if this Profile can be Machined on the radius moulder it’s “YES” otherwise “NO”
* Radius Labour Cost Lnft = Select one from the list (Blank is if we order a blank s4s to machine inhouse)
* SO# (Sales Order #) = Order number that required this new profile
* Cross Reference = if there is a number or part # that is used by other companies or customers
* Notes = Any notes or information you may want to include
* Catalog = “Yes” if it is a nice looking profile to include in our catalog, “No” if it is a weird or none standard looking Profile.
* Effective To Date = delete the date for your moulding.
DO NOT EDIT ANY OTHER CELLS!!!!!!!!!!!!!!!!!!!!!!!!!!!
